Amazon Subscribe & Save Dashboard
Amazon Sellers may measure Monthly Recurring Revenue (MRR) and Customer Lifetime Value (CLV) to comprehend better (and forecast) their sales through Amazon’s Subscribe & Save program.
The most significant benefit of Defog is that it downloads Amazon Sellers’ data to Google Sheets and automatically updates it. Sellers may then analyze their data using Google Sheets tables, pivot tables, and charts.
This article will walk you through creating a dashboard for the Amazon Subscribe & Save program. This dashboard will allow you to track your total number of subscribers, revenue, and units sold by month. You will be creating tables like the ones below:

This dashboard will automatically update as Defog updates the data and new orders from the Subscribe & Save promotions appear. There is no need to click “refresh” like in Microsoft Excel. If you haven’t done so yet, try Defog for free here.
Let’s do this:
Step 1: On your desktop browser, open your Defog spreadsheet on the OrdersTable tab.
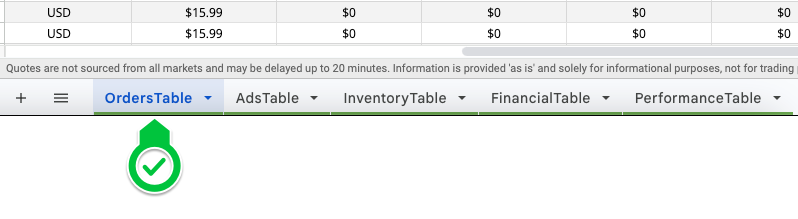
Image 1 – Open Defog on the OrdersTable tab
Step 2: Start by selecting the initial column of your pivot table. Click on the Column E.
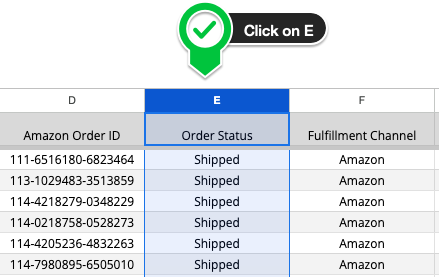
Image 2 – Click column E
Step 3: Now select the final column of your pivot table. Shift-click on Column AC – you have selected all rows, including the ones that will be added in future updates to the OrdersTable, between Column E and AC.
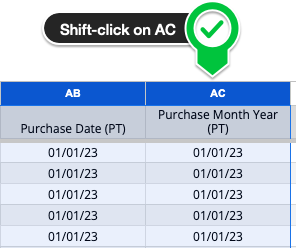
Image 3 – Shift-click column AC
Number of units, number of subscribers, and sales amount per month
Step 4: With the table selected in the previous steps, click Insert on the top Google Sheets menu and then click Pivot table (Image 4.1). Then click Create in the pop-up window (Image 4.2). You will create a new tab on your Defog that will look like Image 4.3 below.
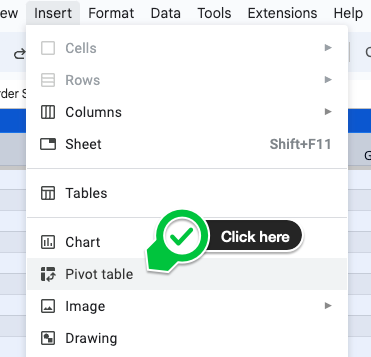
Image 4.1 – Click Insert > Pivot table
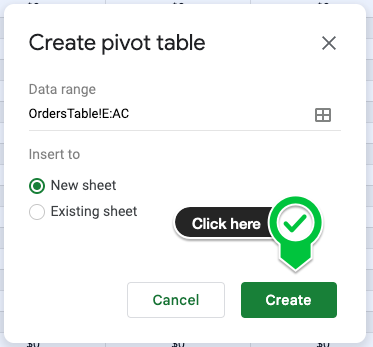
Image 4.2 – Create a pivot table on a new sheet
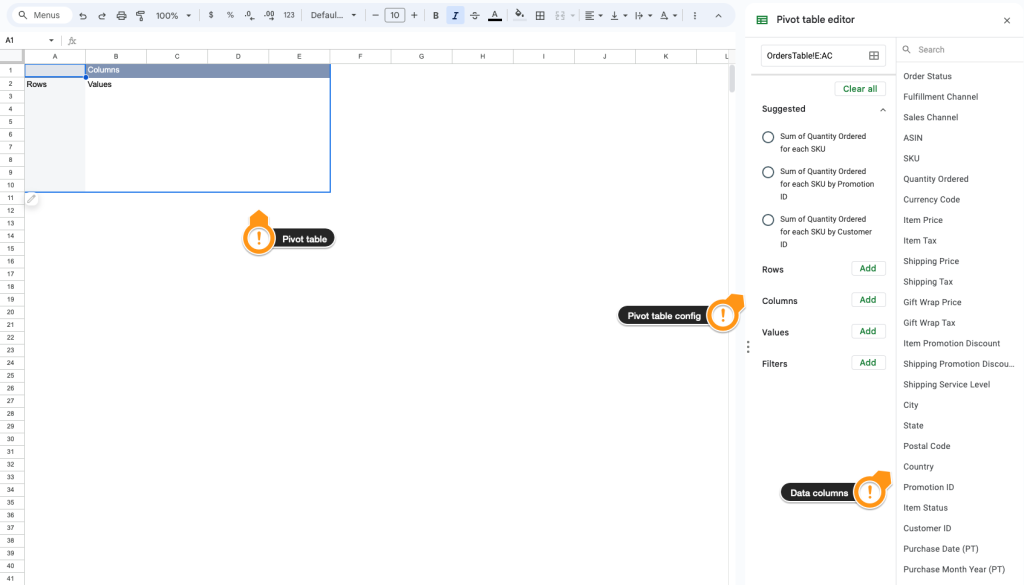
Image 4.3 – Your new pivot table
Step 5: Now is the time to populate your pivot table with the desired data. Let’s start by selecting (filtering) only the orders from the Amazon Subscribe and Save program. First, click Promotion ID in the data columns to the right of the tab.
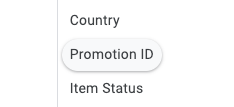
Image 5 – Click on Promotion ID
Step 6: Drag and drop the Promotion ID column to the area below the session Filters on the pivot table configuration column (image 6).
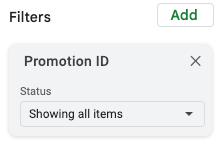
Image 6 – Drag and drop the Promotion ID
Step 7: Click on the Promotion ID box and click Clear (blue link in the middle of the box). This will unselect all the values in the Promotion ID column.

Image 7 – Click Clear to unselect all the values in the column Promotion ID
Step 8: On the search box in the middle, write “subscribe” (without ” “). This will filter only the values with the word subscribe, then select (click on) all options with the word subscribe (one check mark will appear to the left of each option chosen). Click OK to end.
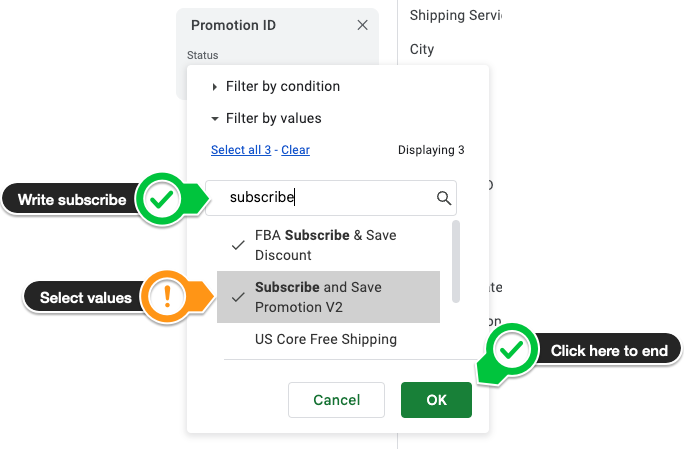
Image 8 – Filter and select only values with the word subscribe, then click OK
Step 9: Using the exact drag and drop mechanics above, drop the Purchase Month Date (PT) below session Rows on the pivot table configuration column (Image 9)
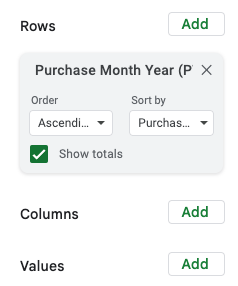
Image 9 – The months will appear as rows on your pivot table
Step 10: Select the pivot table values. One by one, drag and drop Quantity Ordered (units), Item Price (orders amount), and Customer ID (which will count the number of subscribers) and drop them below Values. The pivot table configuration will look like in Image 10.
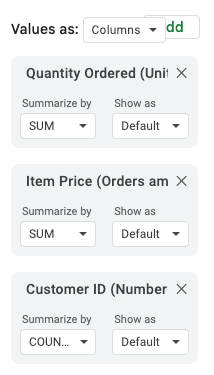
Image 10 – The values on the pivot table configuration
Add columns per SKU to your pivot table
Now that you have completed your new pivot table for the Amazon Subscribe&Save program, you can add columns to compare the program’s performance per SKU. To do that, we suggest you copy your entire pivot table and paste a new one on the same tab, two columns to the right of your pivot to separate them.
Step 11: Edit the new pivot table (the one on the right) by clicking on the pencil icon on the bottom when your mouse is over the pivot table (Image 11).
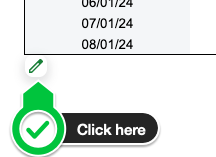
Image 11 – Edit the right pivot table
Step 12: Drop the data column SKU below the session Columns. Your final configuration will look like in Image 12.1.

Image 12.1 – A pivot table with Subscribe & Save per SKU
After a few cosmetic adjustments, you can finalize your new dashboard, which looks like Image 12.2 below.
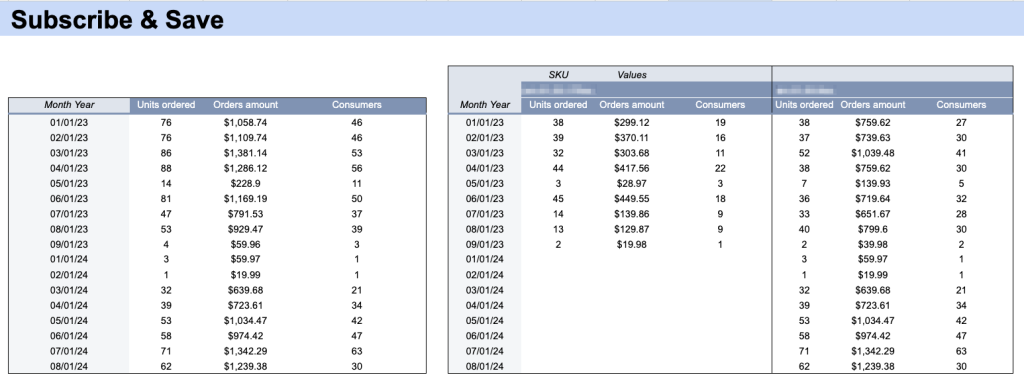
Image 12.2 – Amazon Subscribe & Save dashboard
As a bonus, you can create the following pivot table showing the number of months the consumer has been a subscriber, their last purchase month and the total units ordered. With this table, it is easy to calculate your subscribers’ lifetime value (LTV). Please see the configuration in Image 13.1 and what the first lines of the table will look like in Image 13.2.
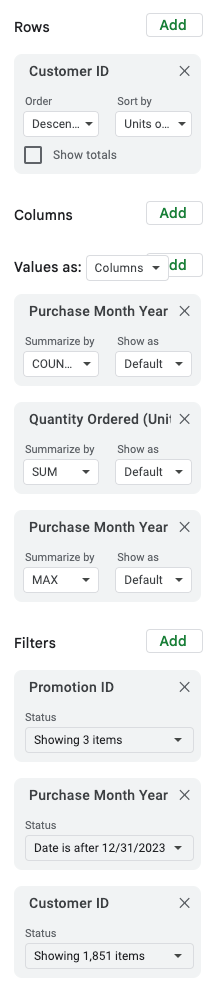
Image 13.1 – Bonus pivot table configuration

Image 13.2 – Bonus pivot table with a view per subscriber
If you want to learn what a particular column stands for on Defog’s tables, please visit our glossary.
Thank you for reading this post. If you still haven’t used Defog, try it for free here.
If you need any help, we are here for you. Please click here for support.
Disclaimer: Defog is not responsible for any decisions made by the reader of this post regarding forecasting or any other use of the data and formulas provided.